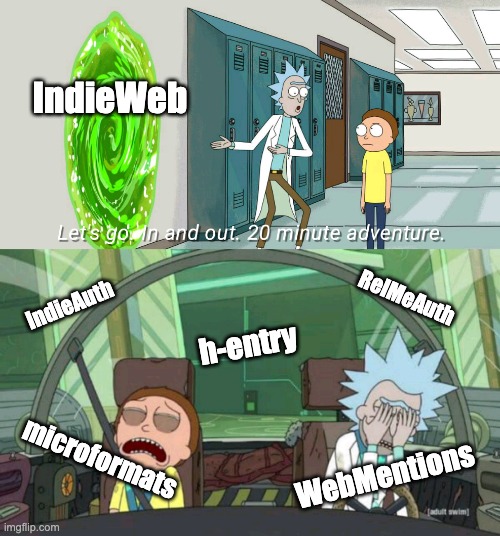
Down the IndieWeb
Recently I've been quite hooked on the whole IndieWeb idea that tries promote a more diverse internet, like in the early www-days, before most of the internet's traffic passed through one of the big FAANG companies.
With this post I'd like to start documenting my findings while diving head-first into the subject and present some of the IndieWeb's protocols I've implemented in this blog.
So let's jump right in because what can possible go wrong?
Starting Point
As with everything new, the elephant in the room is - where do we even start? Fortunately, the IndieWeb wiki provides us with a rough system to measure our site's indie-webness called the IndieMark.
This indie page benchmark describes a bunch of features one can use/implement in their own website and associates a level system to those features, roughly based on difficulty.
As of the time of writing it is more of a guideline than a concrete plan to follow but we'll stick with it for the time being and take a look what it takes to clear level 1.
Identity
The first points can be gained by owning a personal domain which I obviously already have with this blog. If you don't, then it is basically a matter of picking a domain registrar and buying the domain name of your liking.
Identity ✅ - moving on.
Authentication
Now we immediately come to something more interesting. With our new domain in hands, we can also repurpose it as a unique identifier for logging into other platforms.
The IndieWeb's way to achieve this is called IndieAuth. It essentially is an extension to the well-known OAuth2 authorization protocol that adresses most of OAuth's shortcomings when it comes to dynamically registering clients and identifying (authenticating) users. Have a read through Aaron Parecki's great blog post where he explains the motivitation behind this new OAuth2 extension.
The gist of it is that, instead of using user accounts located on different platforms as identity providers, one can directly use their personal domain as it is already tied to a single person and therefore uniquely identifies them.
Looking at the implementation side of things, there are two ways we can make use of IndieAuth:
First, we could implement our own custom, IndieAuth-compliant, identity provider. Though a very interesting topic, knowing a bit about OAuth2 and reading through the spec shows, that it will be quite a lot of work. Furthermore when it comes to authenticating against our custom identity provider, we are still left on our own on how to actually do it:
It is up to the authorization endpoint how to authenticate the user. This step is out of scope of OAuth 2.0, and is highly dependent on the particular implementation. Some authorization servers use typical username/password authentication, and others use alternative forms of authentication such as [RelMeAuth], or delegate to other identity providers.
Quite a bummer, because implementing a whole login system to authenticate a single user is not exactly what I would call a good return on investment.
Fortunately for us, the spec already mentions a second option - RelMeAuth.
RelMeAuth makes use of an existing IndieAuth implementation (like IndieLogin.com) and a third-party identity provider (Github in my case) to handle the whole authentication.
This works by setting up links on our home page that point to a possible third-party identity provider and also adding a link back to our homepage in the profile settings of the third-party page.
The flow then looks somewhat like this:
- We enter our domain at an existing IndieAuth service
- The IndieAuth server parses our RelMe-links and picks one identity provider it supports
- The IndieAuth server follows the link and verifies that the target page also links back to our home page therefore validating that we are in control of both sites
- The IndieAuth server starts a regular OAuth2 flow against the third-party identity provider and we get authenticated as usual
This whole procedure sounds a bit complicated (and arguably it also is) but in practice it is quite easy to support. All we need to do is add a link to our Github profile that points to our home page, and a RelMe link on our home page that points to our Github profile:
<a rel="me" href="https://github.com/<username>" target="_blank">Github</a>With this set, if we now head over to IndieLogin.com, we are able to successfully authenticate - wuhu!
"But isn't that just a regular social login with extra steps?" - you may ask. And yeah that's somewhat correct but the big benefit with IndieAuth is that our identity is no longer tied to a specific account/platform, not even a single E-mail address. Our identity is our domain and as long as we keep it we can switch authentication methods as we please.
Pretty cool - but in practice not a lot of platforms support IndieAuth and it is therefore still rather niche, but that will hopefully change in the long run.
Authentication ✅ - a pretty hard earned point.
Posts
The prerequisite for this section is to actually have some original content on our websites (if you can read this post this is already done).
The second requirement is to use h-entry markup in our posts. h-entry is part of the microformats2 specification that adds additional properties to HTML tags so webpages are not only nice to look at for humans but also easy to parse for machines.
There is no immediate benefit in adding any microformats properties but it enables a lot of the more complex IndieWeb protocols like WebMention or being consumed by IndieWeb readers. So let's be lawful citizens and add them to our HTML markup.
Again the IndieWeb community got us covered and provides us with a good example of how an article should look like:
          <article class="h-entry">
        <h1 class="p-name">Microformats are amazing</h1>
        <p>Published by <a class="p-author h-card" href="http://example.com">W. Developer</a>
          on <time class="dt-published" datetime="2013-06-13 12:00:00">13<sup>th</sup> June 2013</time></p>

        <p class="p-summary">In which I extoll the virtues of using microformats.</p>

        <div class="e-content">
          <p>Blah blah blah</p>
        </div>
          </article>
As we can see, implementing microformats is only about using proper HTML tags and adding a couple of standardized class attributes to the elements so it is easier to programmatically find information on the page.
After the adaptations my article markup now looks like this:
          <article class="h-entry">
        <div style="display: none;">
          <a class="u-url" href="https://www.eldelto.net/articles/implementing-an-atom-feed"></a>
          <a class="p-author h-card" href="https://www.eldelto.net/">eldelto</a>
        </div>

        <div class="timestamps">
          <span>Created: <time class="dt-published">2024-03-16</time></span>
        </div>

        <h1 class="p-name">Implementing an Atom Feed</h1>
        ...
        <section id="validations">
          <h2>Validations</h2>
          ...
        </section>
        ...
          </article>
The article is now properly wrapped in an article attribute and there are additional anchor tags that point to the article's URL and a minimal h-card denoting the author. I opted to hide both of those elements by setting style="display: none;", which is a legal thing to do for microformat attributes, as the consuming clients don't really care about any CSS rules. Lastly, I added p-name to the title of the article and dt-published to the publish timestamp.
To verify that our h-entry implementation works as intended, we can make use of the h-entry validator on indiewebify.me. It takes an URL and returns diagnostics/suggestions about our h-entry support:
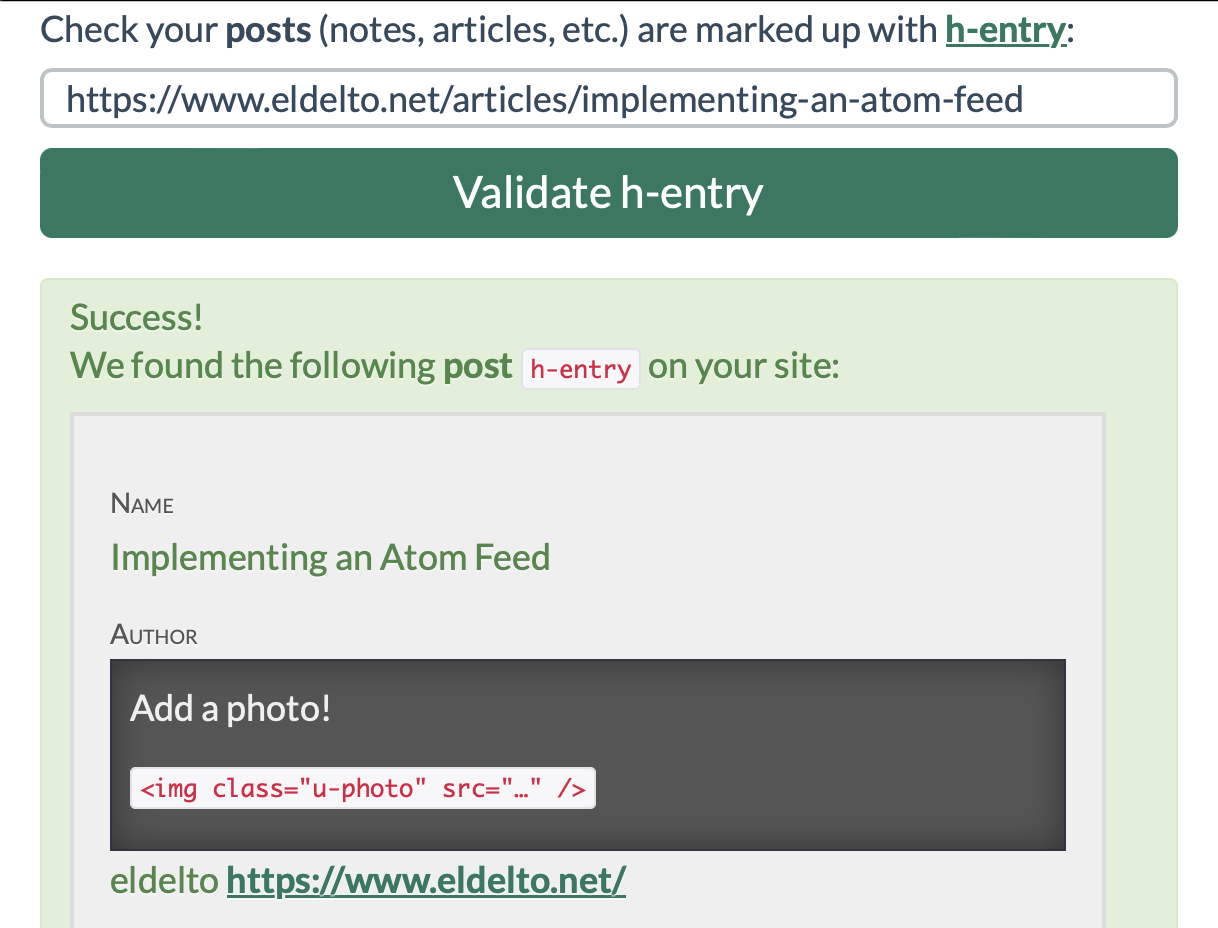
Posts ✅ - rather straight forward, requiring only small changes.
Searchability
Last but not least, searchability. This section is about making our posts discoverable by other people (mainly through being indexed by the most popular search engines).
The first thing to check is if we have a robots.txt that allows search engines to crawl our posts. If we don't have any content that we strictly would not like to appear in search engines we can use the robots.txt file to prohibit them from crawling specific sites. If that is not the case it is easiest to just omit it altogether, which doesn't restrict any crawlers.
Not 100% necessary, but if we want to speed up discovery of our posts, we can also add a sitemap.txt to our website that lists all of the content we definitely want to be indexed and submit it manually to <search engine of your choice>. Most search engines even provide a sort of management console to verify which pages have been indexed and for which indexing failed.
The sitemap.txt of this blog looks like this:
          https://www.eldelto.net/articles/building-more-faster-part-2---goldilocks-project
          https://www.eldelto.net/articles/building-more-faster-part-3---the-need-for-speed
          ...
          https://www.eldelto.net/articles/systemd-cheat-sheet
Of course all of this only works if our content is delivered as plain HTML, which should be the default case for most projects, unless one uses React or any other single-page application (SPA) style approach. Then we would also need to think about pre-rendering the Javascript content and similar issues related to crawlers not executing Javascript, but when working with ol' reliable server-side templates this is none of our business (take that SPA devs!).
This already brings us to the very last thing to do before we complete the first IndieMark level - site-specific searchability.
Sounds like we need to implement a custom search function for our website but in reality it is only about being discoverable via site:<your domain> on popular search engines (a home-brewn search implementation will be a later topic though).
If we implemented all the aforementioned steps, and are getting properly indexed, this functionality should come without any additional effort.
E.g. to search over all the posts in this blog one can simply run this query.
Searchability ✅ - check.
Verdict
This finally concludes our somewhat lengthy dive into what it means to run a compliant IndieWeb page. Most things have been rather straight forward but the next levels will pack more of a punch but also touch on more interesting topics.
IndieMark Level 1 ✅ - over and out.